Contents
Testing
Testing is a program analysis technique that aims to check the correctness of a piece of code just by observing its executions. Suppose that we have this Java application:
package org.example;

public class Main {

    public static int add(int a, int b) {
        return Math.addExact(a, b);
    }

    public static void main(String[] args) {
        int a = Integer.parseInt(args[0]);
        int b = Integer.parseInt(args[1]);

        int result = Main.add(a, b);

        System.out.println("The result is "+result);
    }
}
We want to check if the function adds behaves correctly. The function should return the sum of two integers: if we have, for example, 3 and 4, Main.add should return 7.
We can check manually by running the main method. As you can see, the main function takes in input the two numbers to add as arguments. With the “run” task of gradle, one can pass arguments using the flag –args, as the next example shows:
~/IdeaProjects/Gradle-GettingStarted ./gradlew run --args="3 4"

> Task :run
The result is 7

BUILD SUCCESSFUL in 799ms
2 actionable tasks: 1 executed, 1 up-to-date
~/IdeaProjects/Gradle-GettingStarted
The function seems to behave correctly. But what we can say for all the other integers? We didn’t know. Let’s try some other cases:
~/IdeaProjects/Gradle-GettingStarted ./gradlew run --args="-3 -10"

> Task :run
The result is -13

BUILD SUCCESSFUL in 810ms
2 actionable tasks: 1 executed, 1 up-to-date
~/IdeaProjects/Gradle-GettingStarted ./gradlew run --args="56 -1"

> Task :run
The result is 55

BUILD SUCCESSFUL in 728ms
2 actionable tasks: 1 executed, 1 up-to-date
~/IdeaProjects/Gradle-GettingStarted ./gradlew run --args="452 123"

> Task :run
The result is 575

BUILD SUCCESSFUL in 770ms
2 actionable tasks: 1 executed, 1 up-to-date
~/IdeaProjects/Gradle-GettingStarted ./gradlew run --args="-452 123"

> Task :run
The result is -329

BUILD SUCCESSFUL in 717ms
2 actionable tasks: 1 executed, 1 up-to-date
~/IdeaProjects/Gradle-GettingStarted
What we are doing here is called manual testing: it requires that a person (tester) put himself in the shoes of an end-user to test the application’s features to ensure correct behavior. However, testing an application this way could be time-consuming and costly, and often could lead to human error. Automated Testing comes with our help: it is a testing method that permits the definition of tests in a programmable way. The idea is to write some software to check automatically the execution of our program. The intuition is that instead of manually trying some combinations of numbers and checking that the sum provided by our program is correct, we can define a set of cases that we want to test and then run automatically software that controls that these cases produce the correct results. This lesson aims to show how we can use a Java Framework (JUnit) that permits us to write and run tests. The benefits of using an automated test arise with more complex examples: suppose that you wrote a function that does something and you are manually testing it. You want to test 100 distinct input values to be sure that your function behaves correctly. So you start testing, and on the 99th test, you find that something is wrong. In that case, you need to fix the code, and you need to redo all the tests! This requires a lot of time, and having an automated testing mechanism permits testing all the inputs at once.
NOTE: this doesn’t mean that manual testing is useless, indeed it is required in the early phase of the software development, before automating, to check automation feasibility. In addition, when you download and try a beta version of an application, you are actually performing some sort of manual testing.
Unit Testing and Integration Testing
Before going into details, it is necessary to say something about different testing processes. Here we will focus on Unit Testing, that is, testing the correctness of software components (for example, a function or a class) in isolation. This is the first phase of testing and it is considered white-box testing: these tests are performed by a developer that knows the internal design of the software.
If we want to test how two or more software components interact with each other we need to talk about integration testing. Integration tests are performed after unit tests and don’t require a knowledge of the internal design of the software (black-box testing). The idea here is to test the correctness of the interface between software units (for example, testing that if you log in to a website you will be redirected to your account page).
JUnit
JUnit is a unit testing framework for the Java programming language. Let’s see how it works.
First, we need to add JUnit dependencies in our build.gradle file (use the Gradle-GettingStarted project, and replace the Main class with the one provided in this lesson).
dependencies {
    testImplementation("org.junit.jupiter:junit-jupiter-api:5.9.0")
    testRuntimeOnly("org.junit.jupiter:junit-jupiter-engine:5.9.0")
}- testImplementation is a configuration that tells the required dependencies used for compile tests.
- testRuntimeOnly defines the dependencies required only at test runtime. Now, inside src/test/java, create a class called UnitTests and insert these lines:
import org.example.Main;
import org.junit.jupiter.api.Test;

public class UnitTests {

    @Test
    public void testAdd() {
        if (Main.add(12, 34) != 46) {
            throw new ArithmeticException("Wrong!");
        }
    }
}
Before going further, let’s spend some words on the method testAdd. The @Test annotation tells that the method is a test method. The body of the method is self-explanatory: simply, it checks that the value returned by the method add is correct, if not, it raises an exception. This simulates what we did “by hand” just some minutes ago. If the test raises an error, it means that there is something wrong with the method. You can run tests with gradlew from the terminal.
./gradlew test --tests # launch all the defined test methods
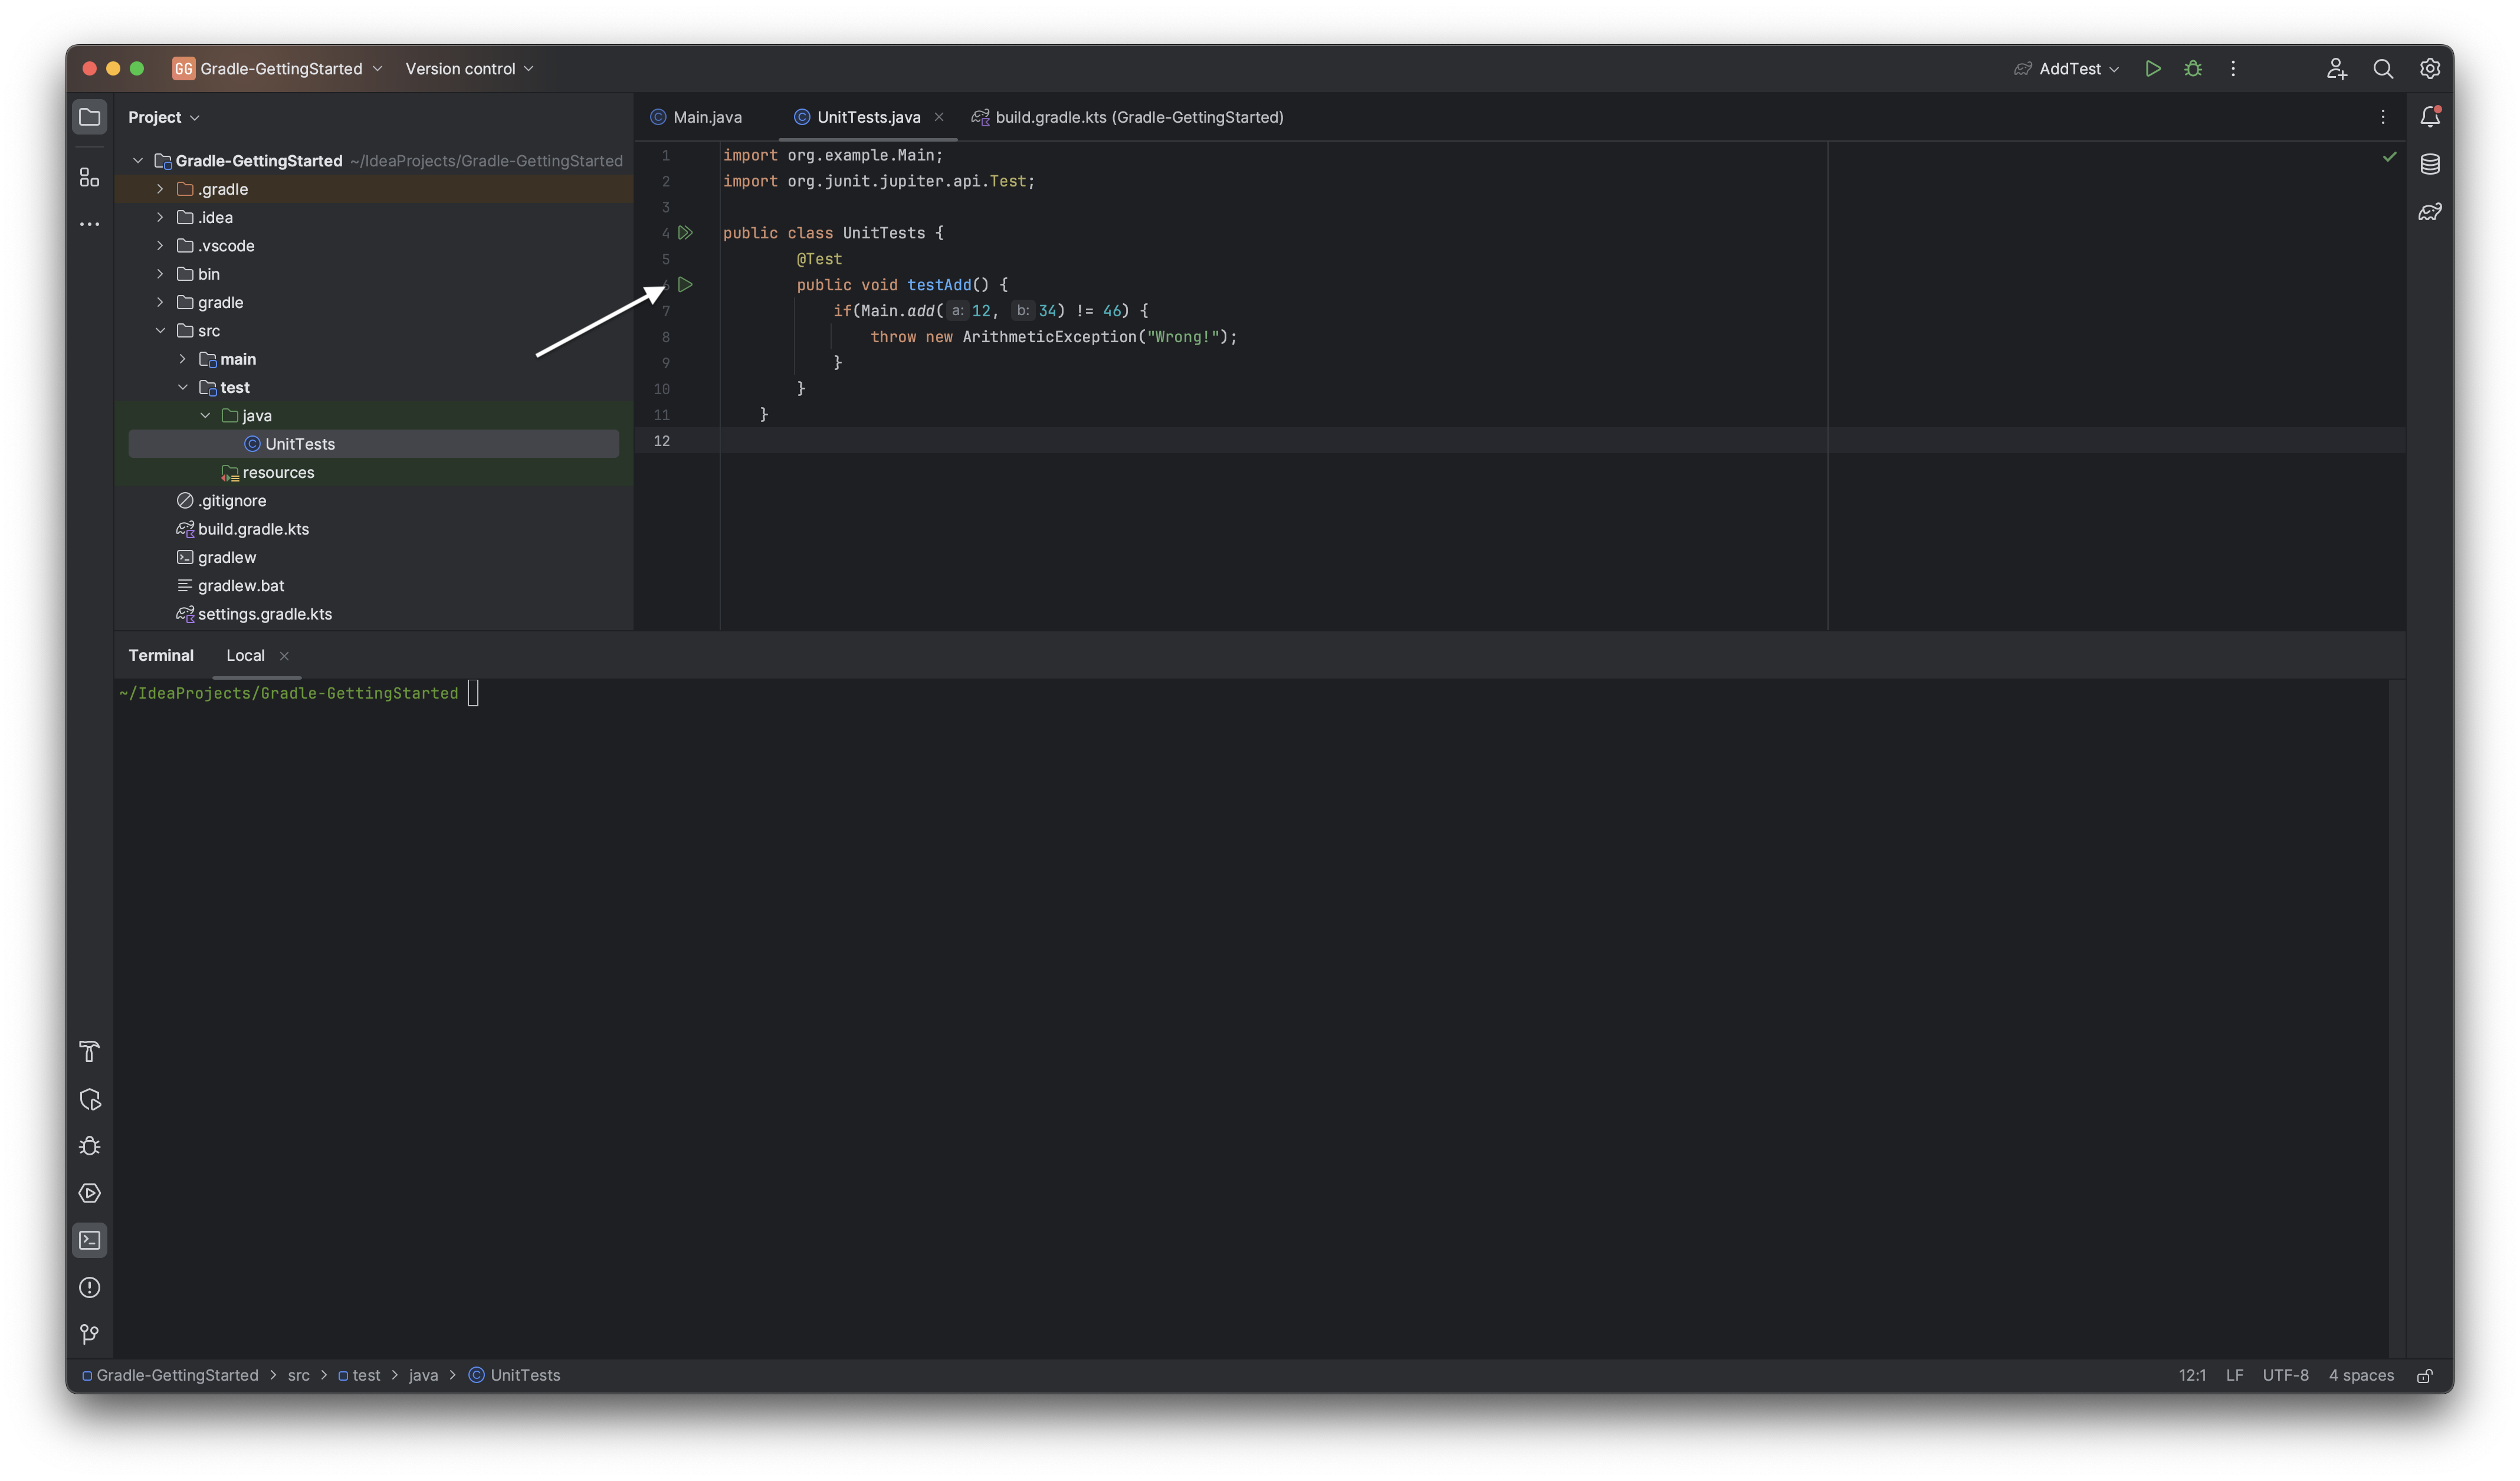
./gradlew test --tests 'UnitTests.testAdd' # launch test method testAdd of class UnitTestsIf you are using IntelliJ, probably you have noticed that a play button appears on the right of the method signature:
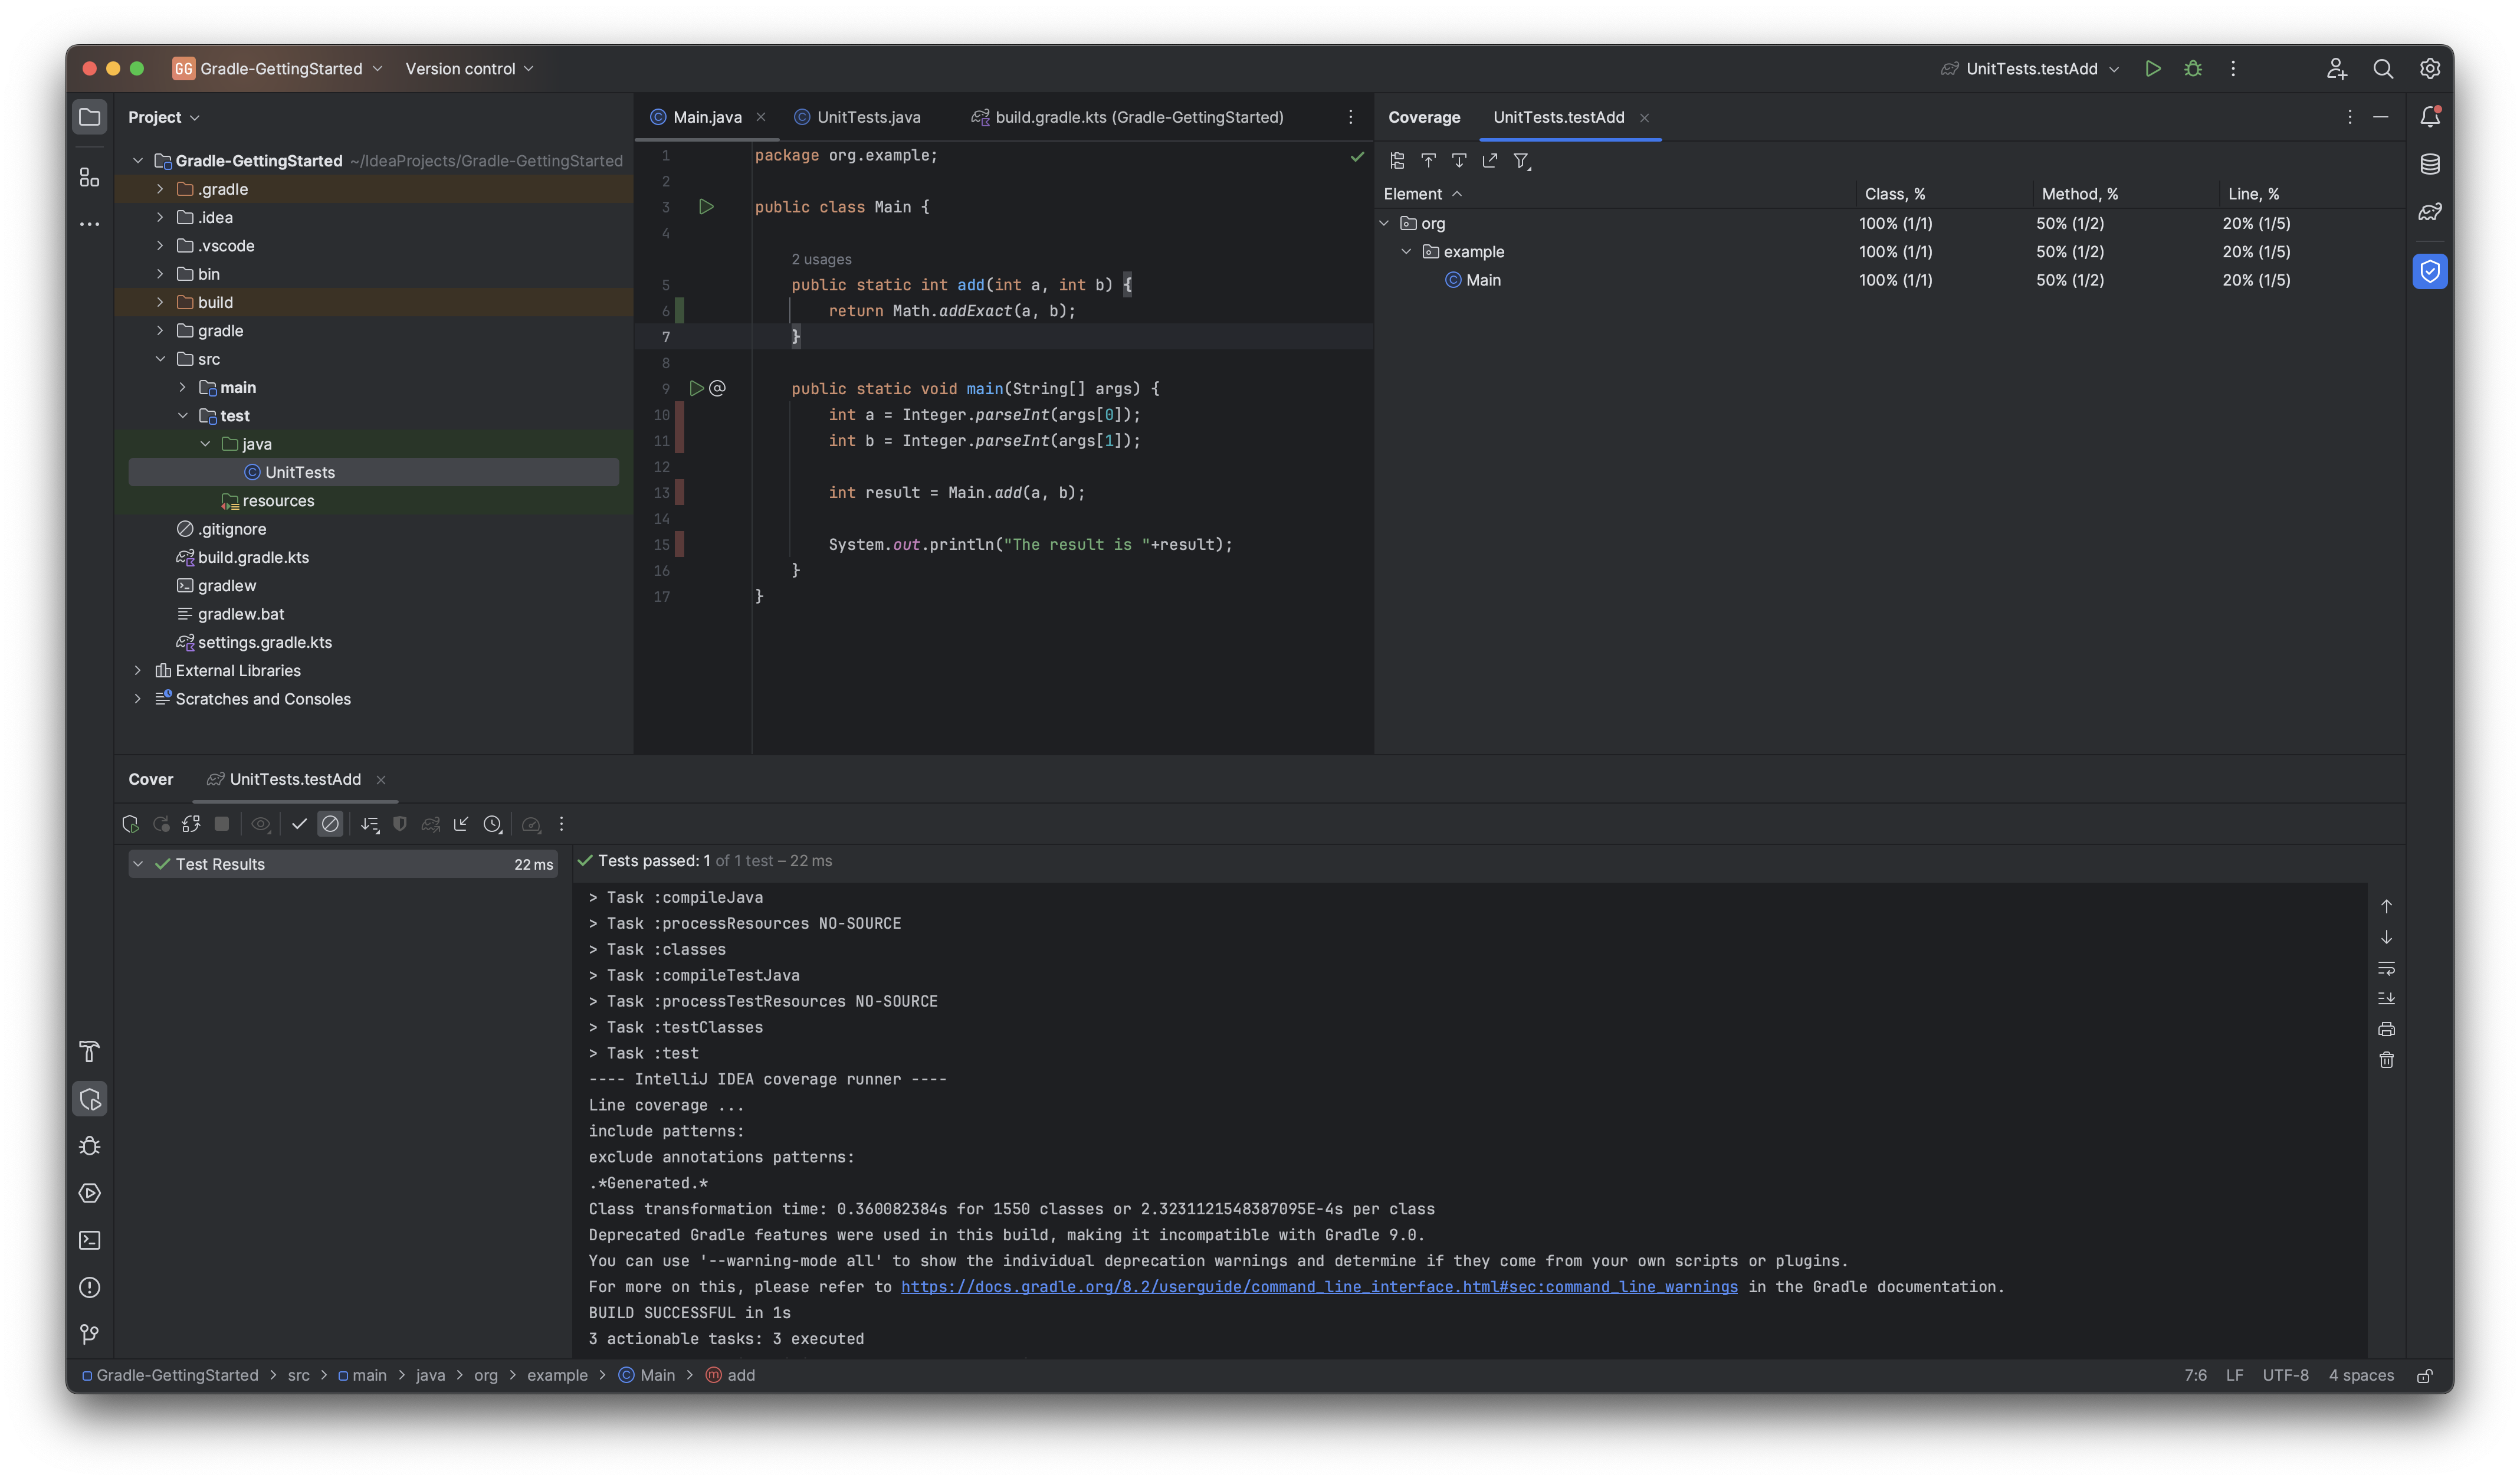
 If you click on it, you can run the test, or among the other things you can run the test with coverage. Choose run with coverage. Now, on the right, a window will appear telling you the coverage (i.e. the percentage of your code that your test reaches: for our case, we cover all the classes, 50% of methods (1 method of 2), and the 20% of code lines). of your test. Open the Main class and notice the green shape on the left of the function “add”. This means that the “testAdd” function executes the function completely. Of course, we didn’t call the “main” method from the test, so the main has no coverage (highlighted in red).
The importance of writing tests that make sense
Our test passed successfully and covered all the lines of our add function. But are we really, really, really sure that the function is bug-free? Spoiler: no. To tell you why, we need a more complex example. Suppose that we have this function, that checks if two String has the same amount of 0s:
public static boolean equalZero(String a, String b) {
    int countA = 0;
    int countB = 0;
    for (int i = 0; i < a.length(); i++) {
        if (a.charAt(i) == '0') {
            countA += 1;
        }
    }
    for (int i = 0; i < a.length(); i++) {
        if (b.charAt(i) == '0') {
            countB += 1;
        }
    }

    return countA == countB;
}
End we have this test:
@Test
public void testEqual0() throws Exception {
    if (!Main.equalZero("Hell0", "Hell0 World!")) {
        throw new Exception("Wrong!");
    }
    if (!Main.equalZero("0100001111", "10000101111")) {
        throw new Exception("Wrong!");
    }
    if (Main.equalZero("0", "1")) {
        throw new Exception("Wrong!");
    }
    if (!Main.equalZero("", "11")) {
        throw new Exception("Wrong!");
    }
    if (!Main.equalZero("", "")) {
        throw new Exception("Wrong!");
    }
}
Let’s try to launch the test:
~/IdeaProjects/Gradle-GettingStarted ./gradlew test --tests 'UnitTests.testEqual0'

Deprecated Gradle features were used in this build, making it incompatible with Gradle 9.0.

You can use '--warning-mode all' to show the individual deprecation warnings and determine if they come from your own scripts or plugins.

For more on this, please refer to https://docs.gradle.org/8.2/userguide/command_line_interface.html#sec:command_line_warnings in the Gradle documentation.

BUILD SUCCESSFUL in 1s
3 actionable tasks: 3 executed
~/IdeaProjects/Gradle-GettingStarted
As you can see, the test passed. We tried empty strings, strings with different lengths, and strings without zeros. We can also convince ourselves that the function is correct. But… Let’s add this test case:
if (Main.equalZero("0011", "11000")) {
    throw new Exception("Wrong!");
}
Launch the test and notice the error. This simple example aims to show that sometimes a bug can hide itself well in the code, and even if we have defined multiple test cases and covered all the lines of a method bugs can remain unnoticed. To have meaningful tests, it is important to reason about all the borderline cases.
Exercises
- Fix the equalZero function. Can you improve the modularity of this function?
- You have this Java class:
package org.acme;

class QuickSort {

    static void swap(int[] arr, int i, int j) {
        int temp = arr[i];
        arr[i] = arr[j];
        arr[j] = temp;
    }

    static int partition(int[] arr, int low, int high) {
        int pivot = arr[high];
        int i = (low - 1);

        for (int j = low; j <= high - 1; j++) {
            if (arr[j] < pivot) {
                i++;
                swap(arr, i, j);
            }
        }
        swap(arr, i + 1, high);
        return (i + 1);
    }

    static void sort(int[] arr, int low, int high) {
        if (low < high) {
            int pi = partition(arr, low, high);

            sort(arr, low, pi - 1);
            sort(arr, pi + 1, high);
        }
    }
}
Create a Main class that uses the method “sort”, and write a build.gradle file for the project. Write also some tests.